Full of Charm: A Paper Pumpkin Thing Blog Hop
- Vy Tran

- Jul 9, 2025
- 2 min read

Hi! I’m Vy with Crafting Daily Dose. Welcome to this month’s A Paper Pumpkin Thing Blog Hop, featuring alternatives for the June 2025 Full of Charm kit.
This kit included supplies for 9 cards, 3 each of 3 designs. Kits always come with an exclusive stamp set, a mini ink cube, embellishments, and adhesives. As of today, refills are still available for this kit.
This was such a gorgeous kit! My favorite card was the one with the printed flowers and the die cut outline, and I used that to create 2 separate cards by cutting the cardbase in half.
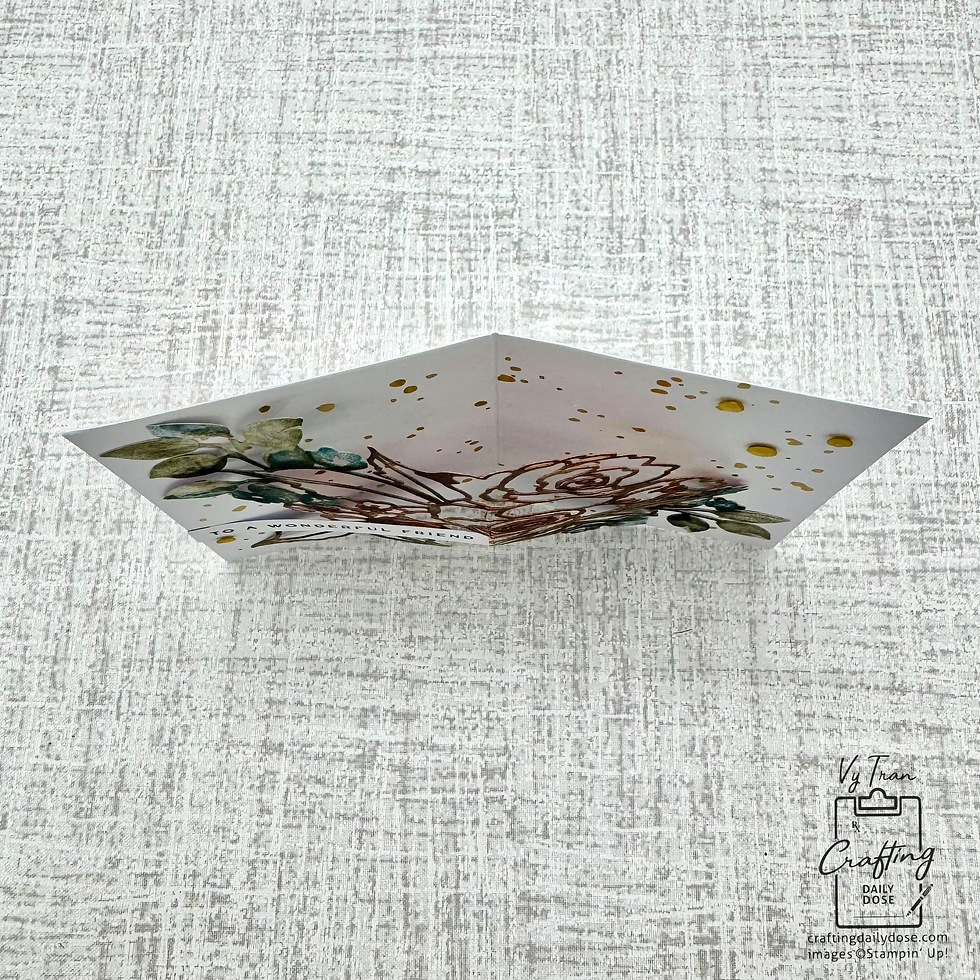
The first alternative is a bendy card could hardly be easier! I simply scored the cardbase panel in half, reinforcing that crease several times so that the paper folded toward the gilded surface. I then adhered the die cut on top, gluing down just some of the solid leaves at the edges. I stamped a sentiment onto the back (white) side of a label and adhered just the left edge. I added a few sequins from the kit for a little added sparkle. The card is simple, but it can stand on its own because it’s slightly flexed, and the die cut lifts up from the surface. The message would be written on the back of the card.
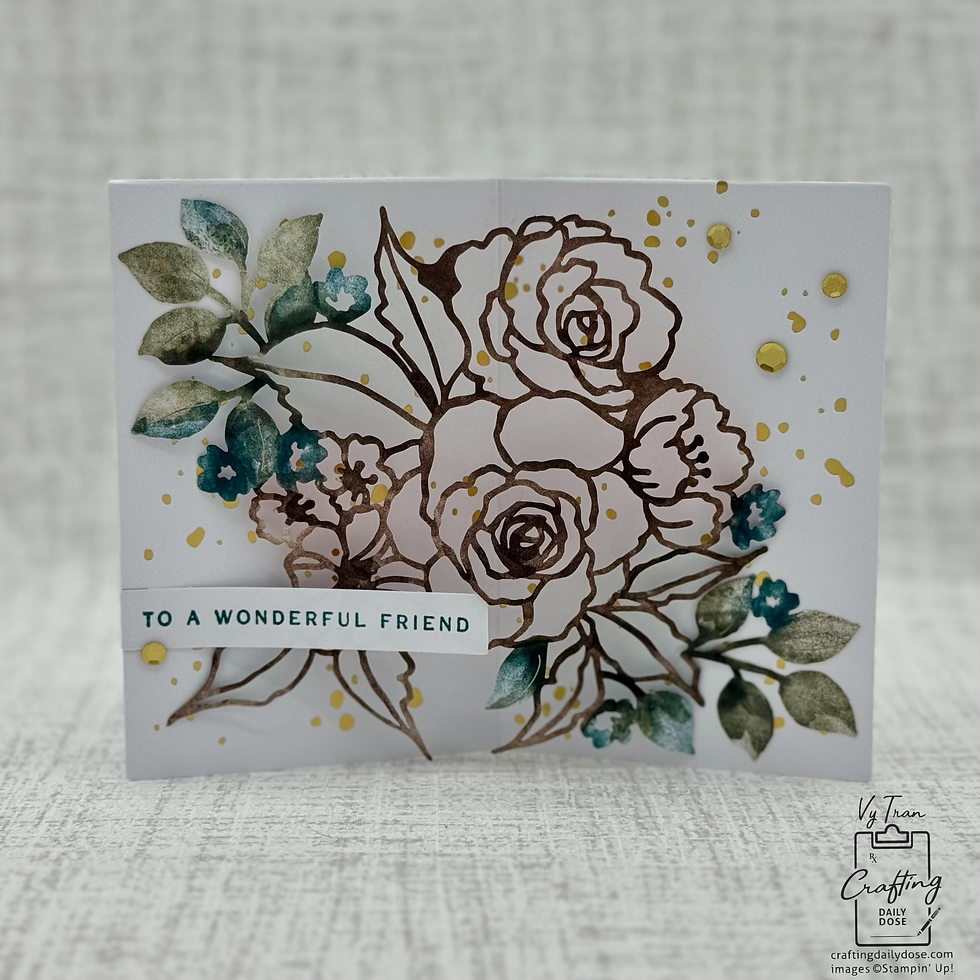
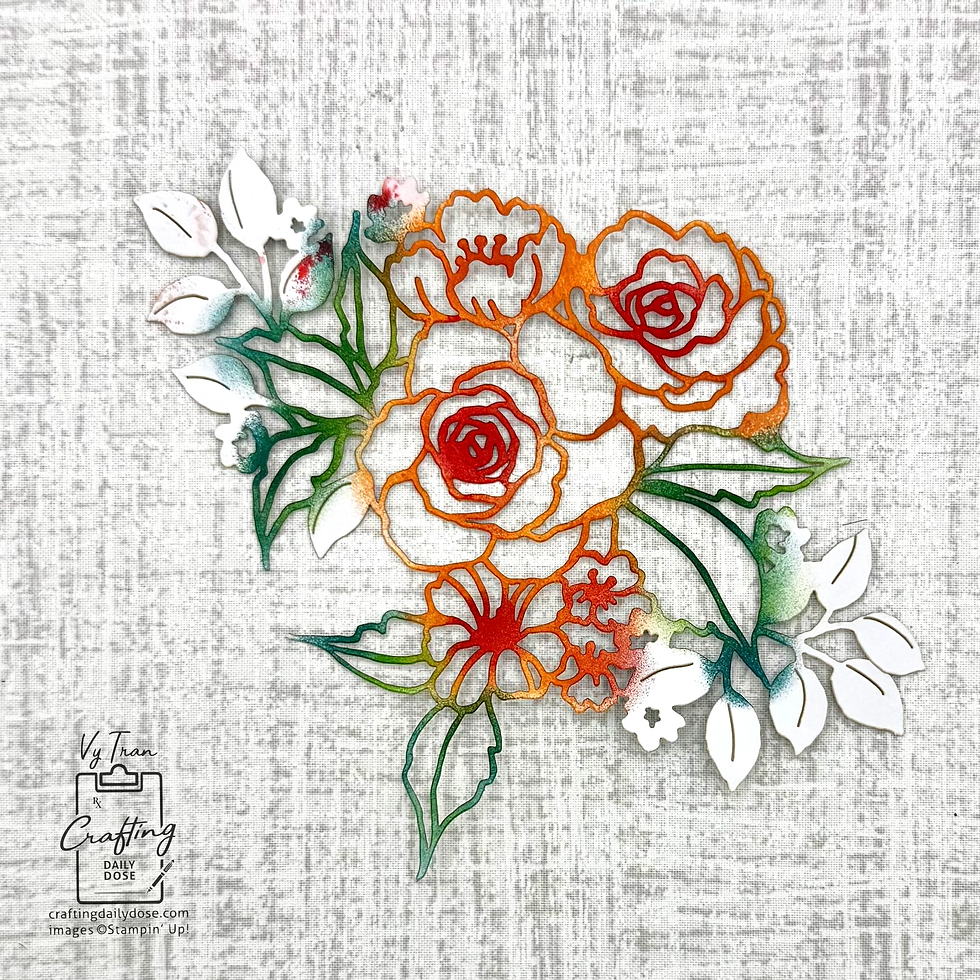
Now if you’re looking very carefully, you might notice that there’s some subtle color cast onto the cardbase, underneath the die cut. This is because I used sponge daubers to color the back of the die cut before adhering it to produce this effect. If you decide you like the colorful better, you can opt to use it instead.
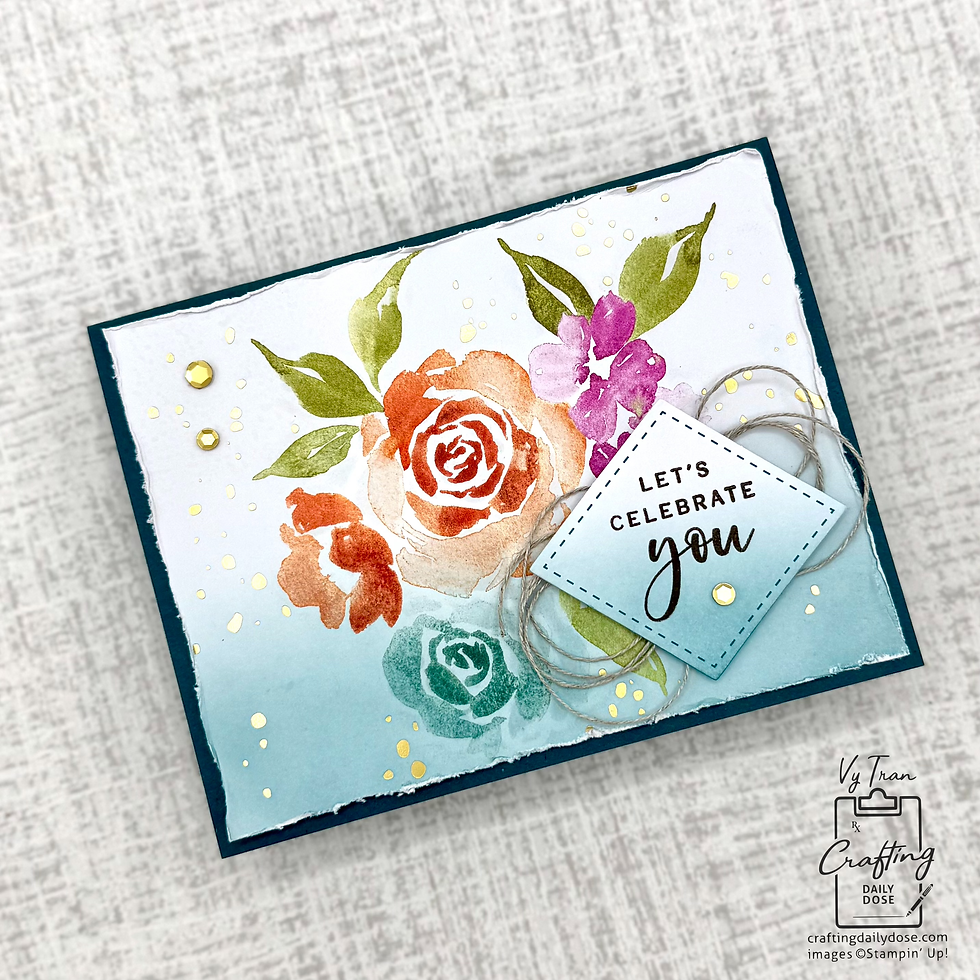
For the second alternative, I trimmed 1/8” off each side of the remaining cardbase panel and used a blending brush to add Pretty Peacock ink, creating an ombré effect along the bottom. I distressed the edges by rubbing them against the blade of an old pair of scissors (be careful not to breathe in the paper fibers that come off as you do this). I adhered this to a Pretty Peacock cardbase. I added ink blending to the sentiment label as well and mounted it onto the card, with some linen thread underneath. All that was left to do was to add on a few sequins from the kit!
Thank you so much for visiting! Don’t forget to follow the hop to see other creative projects from our team!
Shoppable Supply List:


Comments