


Exploring In Color: A Paper Pumpkin Thing Blog Hop
- Vy Tran

- Jun 2, 2023
- 3 min read
Updated: Aug 20, 2023

Hi! I’m Vy with Crafting Daily Dose. Welcome to this month’s A Paper Pumpkin Thing Blog Hop, featuring alternatives for the May 2023 Exploring In Color kit.
This kit included supplies for 9 cards—3 each of 3 different designs. Kits always come with an exclusive stamp set, a mini ink cube, embellishments, and adhesives. As of today, refills are still available for this kit.
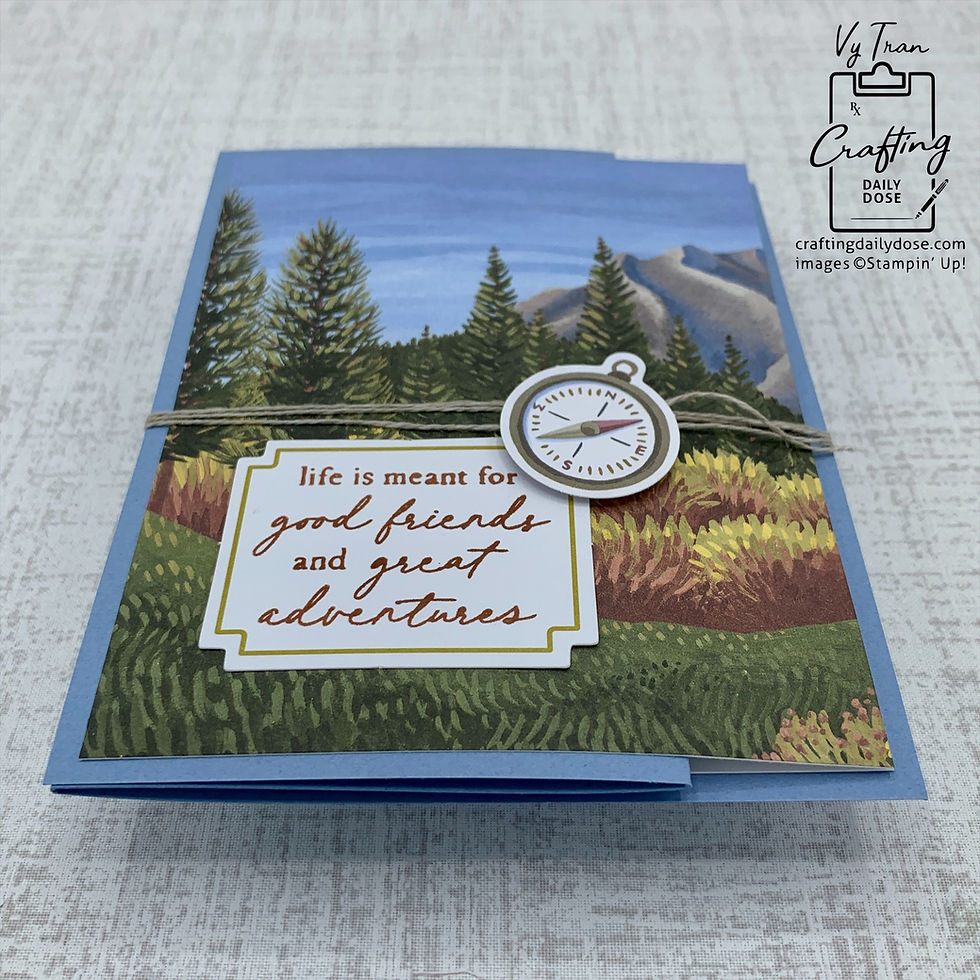
For this first project, I used Boho Blue cardstock to create a Z-fold card, similar to one I've shown before. After creating the score lines, I centered a Basic White layer onto the section on the right. I opened up one of the cardbases from the kit (any of them would be beautiful for this design!) and trimmed the height down to 5-1/4". I then cut it right along the score line. What was originally the back of the cardbase is now the panel on the left, and I trimmed off 1/4" from its left edge. What was originally the front of the cardbase is used for the middle and right panels. The center panel is 2" wide. The right panel can be as wide as 2-1/4" (as shown on this card), or you can trim the right edge to make it as narrow as you'd like, depending on how much room you want to leave for writing a message. I adhered this right panel on top of the Basic White layer.

Here's a closer look if you'd like to make one:
Measurements:
-Boho Blue cardstock
10-1/2” (W) x 5-1/2” (H), scored at 3-1/8" and 6-1/4" along the long side
-Basic White cardstock
4" (W) x 5-1/4" (H)
-Kit cardbase
4" (W) x 5-1/4" (H) for left panel
2" (W) x 5-1/4" (H) for middle panel
2-1/4" (W) x 5-1/4" (H) for right panel, or more narrow if you prefer
-Twine
30", or can be shorter but at least 12"
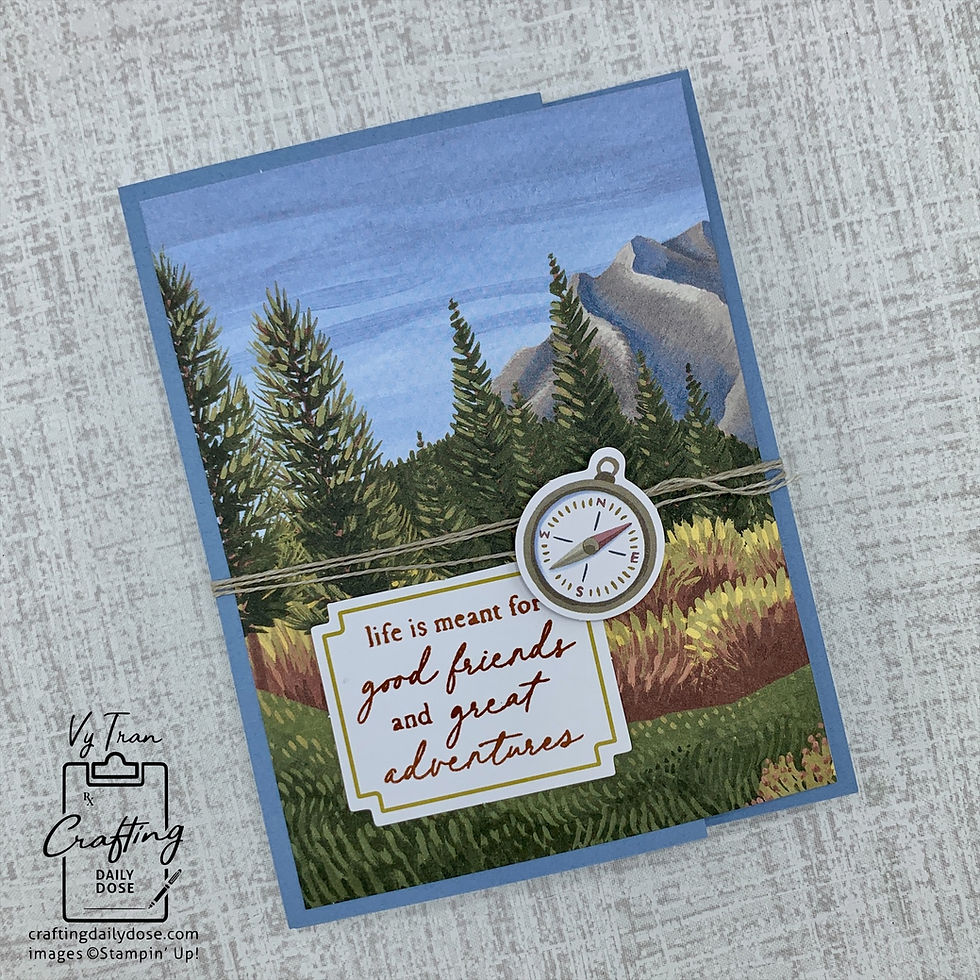
I stamped a sentiment with Copper Clay ink onto one of the die-cut labels from the kit and adhered it to the front. For an interesting card closure, I added the compass with a Dimensional foam sticker and used that to anchor the twine. A 30" length gave me enough to wrap 3 times around the card and then once around the base of the compass (think of office document envelopes that have a string closure). You can definitely use less twine, but you need at least 12" or so to effectively wrap it around once. If you've run out of the compass die cuts, you can always use the stamp set to create your own!
The second project is a pop-up card. I was inspired by the tent on the cardbase and wanted to add one to the inside. I used Designer Series Paper instead of cardstock, to minimize bulk. The tent image is Moody Mauve, so I used coordinating paper for the pop-up. ETA: I've created another version of this card, which includes a tutorial for the pop-up.

I stamped the sentiment using Copper Clay ink and the mug image using Moody Mauve ink onto scraps of Basic White cardstock. I then cut them out and adhered them to the inside of the card.


For the front, I stamped a sentiment onto one of the die-cut labels and attached it with Dimensionals. I added a bit of leftover twine from last month's kit to the back of the binoculars to make them look like they're hanging from the label. If you use the twine from this month's kit, consider coloring it with a dark marker to help it stand out more.
Measurements:
- In Color Designer Series Paper
6" (W) x 5" (H), scored at 1", 3" and 5" along the long side, and at 1-1/8" and 3-7/8" along the short side
- Basic White cardstock
Scraps to fit sentiment and mug image
-Twine
3"
This other version of the card is decorated differently, but you can see how to construct the tent:
Thank you so much for visiting! Don’t forget to follow the hop to see other creative projects from our team!
June 10th is the last day to sign up for this month’s kit, called Welcome Inn. This kit makes 9 cards, 3 each of 3 designs. We'll get a Night of Navy mini ink cube. The kit coordinates with the Country Inn Suite and Welcome Inn dies available in the online store. If you‘re in the U.S. and would like to subscribe to Paper Pumpkin with me, I’ll send you a handmade thank you card, and I’ll be sure to let you know when I post new ideas!

Shoppable Supply List:


Comments